Laser calibration: Difference between revisions
(Laser operating procedure) |
(Safety notice) |
||
| Line 9: | Line 9: | ||
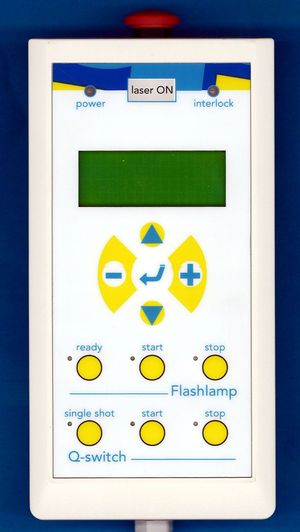
[[File:Control.jpg|thumb|Handheld control unit]] | [[File:Control.jpg|thumb|Handheld control unit]] | ||
=== Safety === | |||
<big> | |||
''NEVER have the key inserted in the "ignition" when the optical fiber is disconnected, the black box is open, or the TPC is open (e.g. gas lines disconnected).'' | |||
</big> | |||
=== Start-up === | === Start-up === | ||
# Check integrity of enclosure, i.e. optics box closed and bolted down, fiber attached at both ends. | # Check integrity of enclosure, i.e. optics box closed and bolted down, fiber attached at both ends. | ||
Revision as of 00:29, 12 May 2017
Introduction
Both the prototype and final TPC have aluminium strips on the central cathode that are intended for laser calibration. To that end a plane of UV laser light is sent into the TPC intersecting with the strips. Each laser pulse should then create a bunch of electrons with well defined position and time at each of the strips.
Photoelectron efficiency tests
One worry with the intended geometry is that the laser hits the far strips at a very glancing angle, and it was assumed the photoelectron efficiency (i.e. number of photoelectrons per photon) would go down in favour of reflection. To prevent this two methods of surface treatment were considered, and both the validity of the aforementioned assumption as well as the effectiveness of the treatments were investigated in a test setup at UBC. Details and results are given in this report.
Laser operating procedure
The following describes the standard operating procedure for running the laser setup on the prototype.
Safety
NEVER have the key inserted in the "ignition" when the optical fiber is disconnected, the black box is open, or the TPC is open (e.g. gas lines disconnected).
Start-up
- Check integrity of enclosure, i.e. optics box closed and bolted down, fiber attached at both ends.
- Turn on laser system with key on main unit.
- Push button "Flash lamp -> Ready" on handheld unit.
- Push button "Flash lamp -> Start" on handheld unit.
- Set collimator via mvat program on computer.
- Open manual shutter on laser head.
- Push button "Q-switch -> Start" on handheld unit.
Pause
Short pause
Simply push stop/start for Q-switch.
Longer pause
- Stop Q-switch.
- Stop flash lamp.
- Close manual shutter.
- After pause restart according to after-key part of start-up procedure.
Shutdown
- Stop Q-switch.
- Stop flash lamp.
- Close manual shutter.
- Wait a few minutes for cool-down.
- Turn off and remove key.
General best practice
- Limit laser shots to a minimum, to reduce wear on laser, flash lamp, and fiber.
- To that end, do non-critical steps like attenuator setting and DAQ start before starting Q-switch.
- Ideally allow system some time to warm up between turning on flash lamp and Q-switch.

