Adding Hosts to a VLAN with Infoblox: Difference between revisions
Jump to navigation
Jump to search
| Line 21: | Line 21: | ||
[[File:Infoblox restart DHCP server.png|1000px|thumb|left|Infoblox may require you to restart the DHCP server in the case that you checked the DHCP checkbox. Click on "restart" in the yellow bar (keep default settings in subsequent prompts).]] | [[File:Infoblox restart DHCP server.png|1000px|thumb|left|Infoblox may require you to restart the DHCP server in the case that you checked the DHCP checkbox. Click on "restart" in the yellow bar (keep default settings in subsequent prompts).]] | ||
Note that we cannot yet see the DHCP logs, talk to kray or dthomson for logs and debugging if needed. | |||
Revision as of 21:11, 10 April 2026
Infoblox is presented as a webpage which allows you to set DNS and DHCP settings for both network and host management.
Basic Usage
The infoblox website is located here: https://infoblox.triumf.ca. You log in with your TRIDENT credentials (without the "@triumf.ca" on your username). You will be presented with a rather empty status screen. The actions needed are taken from the "Data Management" tab, highlighted in red below:


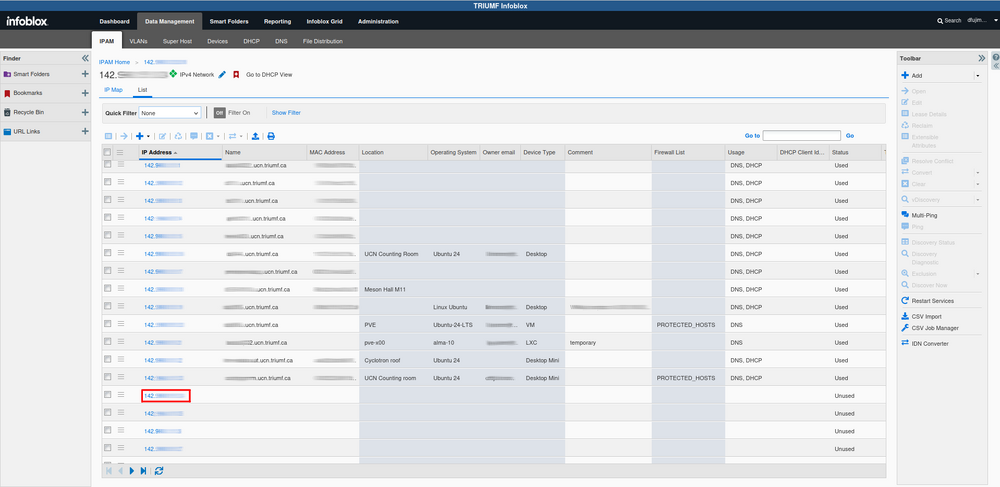
Infoblox IP selection and device list. From here you will see all the devices and their IP addresses. You can edit the columns shown by hovering over any of the column headers and selecting the down arrow. We can add a new host by selecting an IP address with no assigned hostname. To edit a host's details click on that host's IP address.


Note that we cannot yet see the DHCP logs, talk to kray or dthomson for logs and debugging if needed.